for /f “tokens=*” %x in (‘dir /b *.nef’) do dcraw -e %x

Sorry, being a total geek here.

If you are also a command line geek you will look at the above and go Ahhhh…

Otherwise, it means nothing and you can skip over this post.  🙂

For the rest of you — the above “converts” NEF files into JPG faster than anything you have ever seen before.

And is great for converting 250 NEF files you snapped of something totally unimportant that should have been shot in jpg and not raw.

For example: we visited a couple of flats/apartments this weekend (thinking about moving) and I put a Sigma 10-20mm Best of the Best 4: Without Warning hd on my D300 and walked around shooting absolutely everything.  The idea was that once we got home if we thought “hey, was there an xyz in the whatever room of that second one” or something like that we could jsut refer to the images rather than go back or phone and ask.  So to cover everything, even at super wide, I was shooting like crazy.  Barely aiming, not bothering to focus (and that lens managed fine actually, very well for this purpose).

But I got home and found I had 250+ raw files — or almost 4G of data!  Drat, should have switched to jpg for these snapshots, but now what do I do?  Sure I can batch them through ACR or photoshop, but it’ll take forever.

So luckily I had just been looking at dcraw, the command line raw processor recently, I had the Windows build, and tada.

for /f "tokens=*" %x in ('dir /b *.nef') do dcraw -e %x

An command line that takes all the raw files in the directory and spits out jpg files instead.  After that I just del *.nef and I’m done.

Up side:

  • Fast
  • No settings to worry about
  • Fast
  • Did I mention fast?  We are talking less than a second an image.

Downside:

  • It isn’t really converting the raw fileof course, it is merely extracting the basic Jpeg that is embedded in the raw file.  But that’s “good enough” for what I wanted.

Still a good trick and to save me having to think about the syntax next time I have to do this I’m blogging about it so I can go back and refer to my own blog.  I knew there was a reason I was blogging!

And of course now that I know dcraw can do this I’ll be looking to integrate raw preview into Camera Control using this.  In my copious free time!  Huh!

PS.  There should have been a video today about how to do the paper grid spot, but I totally messed up the recordings and all the files are a disaster so this too will have to wait for another time.

Demo Video for DIYPhotobits.com Camera Control 2.1

I thought it was well past time that I did some more explanation of how to use the new features in DIYPhotobits.com Camera Control 2.1.

Turns out my video skills need a bit of work though as I ended up putting together a 10 minute video, the YouTube limit, and only covered half the features. Still, I hope this is helpful both to see what sort of thing the script is useful for — in this case I’m covering self-portrait balancing flash vs ambient ala Strobist.


(Click through and view the high quality version if you want to read the text!)

Equipment used:

  • 1 x SB-600 at camera left set at manual 1/4 power with a folding paper grid spot  on a bamboo light stand
  • 1 x SB-800 at camera right, also manual 1/4 power
  • Nikon D300 with a 18-55mm 
  • Pop-up flash on the D300 is the trigger for the flashes
  • Long USB cable, plus a USB extender cable
  • Thinkpad X31

I cover the use of the remote shutter release, combined with shutter, aperture and ISO controls to take and download images as well as using Bridge to view them.

What I ran out of time to do before the YouTube 10 minute limit was tethered shooting from the camera, and external viewer push.  Perhaps I’ll try to do another short video covering those, but I do really want to work on the next features!

While doing this demo I also noted some odd slowness of the script in some situations, particularly M vs P mode that I’m unable to explain at the moment, so will spend some time to investigate that and hopefully speed the whole thing up.

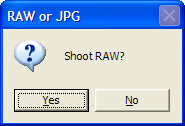
RAW : in remote shutter release script

Two of my scripts let you press a key on the keyboard, or click with the mouse, and remotely release the shutter.  But just like the built in Windows Explorer technique for doing these they both only are able to trigger JPG, even if the camera is set to RAW.

Until today.  It turns out this is not that hard to fix.  But the programatic technique is a bit of a laugh; because Windows Image Automation does not officially support RAW the NEF files on my Nikon D300 are typed as being of “undefined” type.  Unlike JPG files which WIA does know are JPG files and are typed appropriately.

So to get the WIA Take Picture command to get me a NEF I actually have to ask for a picture of type “undefined”!  It’s amazing it works, I guess somewhere an engineer (I’m not sure Microsoft or Nikon) decided that undefined=NEF.  I have no idea of this will also work with Canon, it might or it might not.  

Anyway it works, and it opens up a whole range of possibilities I’ll be exploring soon with the scripting.  But until then head over to the posts for those remote scripts and you can download the latest versions which support RAW.

PS.  Please please no religious RAW vs JPG comments.   It’s a free world, people are entitled to the file format of their choice.

D300 Remote Control Script

Update: This is now obsolete for two reasons, firstly remote is built into windows, and secondly for advance use you have the DIYPhotobits.com Camera Control 1.0 application.

I wrote yesterday about why I need this script to be a remote shutter release for my Nikon D300 so today here are the details of what you need, and how to use it.  Oh, and why not use one of the cheap 3rd party remotes

 (e.g. Phottix N1

or Cleon N8), a real remote like a ML-3 or a MC-DC1 Remote cord?  Well if I can DIY I’d always like to try that first!

Hardware (this is what I used, you can substitute some pieces of course):

  • Long USB cable — doesn’t have to be that long but longer is more convenient
  • One Thinkpad X31 — or any laptop with a USB port and a Wifi connection
  • One Fujitsu Lifebook — or any other laptop with a Wifi connection
  • Wireless access point — so you can connect from one PC to another
  • Windows XP SP2 on both PCs
  • Microsoft Windows WIA Automation
  • The software Linked below
DOWNLOAD (2.0)remote2

– RAW or JPG, you choose

– JPG only
Installation:

Copy the files into any folder on your PC, I suggest c:program filesremote but it’s up to you.

Usage: 

  • Make sure your camera is in USB PTP mode
  • Plug the USB cable into the first laptop and into the camera, turn the camera on and cancel any pop-ups that occur for downloading etc
  • Install the Windows WIA Automation DLL by running install.cmd (you only need to do this once)
  • Run the script c:program filesremoteremote.wsf by double clicking it.

… and here’s the key thing that makes it wireless

  • Now use your second laptop and use the built in Windows Remote Desktop function to connect to the first laptop over your wireless connection.
  • To release the shutter on your D300 just click or use the enter key to press the “OK” button

Works with:

  • Nikon D300
  • Nikon D40
  • … and I presume would on any Nikon dSLR
  • Cost:

    • Long USB cable $2
    • Thankpad X31 $1,099
    • Fujitsu Lifebook $1,507
    • Linksys Wifi Access point $47
    • Windows WIA Automation $0
    • My script $0
    • Total: $2,655

    Or, if you already have all that hardware then :

    • Total: $0

    Variation, remote but not wireless:

    A very long mouse cable or keyboard cable could get you a similar effect with one laptop/computer – but that wouldn’t be so much fun now would it?  Or how about a wireless keyboard or mouse?

    And next:

    And then this could be combined with the tethered shooting script – plus a “advanced to next image” script to get some good results, that’s the next thing to do on the scripting side.

    Please let me know if you try this out and it works for you!  I know this isn’t particularly easy to understand from reading the above, but you’ll find it easy if you try – and I’ll try to do a video some time to show how it works.


    Update: The combined script that has the remote shutter release functionality here plus the tethered downloading I called the “Self Portrait Script” and you can download it

    here .